How I edit my Instagram photos: A step-by-step guide

Before

After
The most common question I receive on Instagram is: "How do you edit your photos to look like that?" Well, today is the day that I lay it out, step by step.
Something to keep in mind is that I shoot and edit my Instagram and blog photos very differently from how I shoot and edit professionally for my clients. For a long I tried to edit the same way in both situations, but it always felt inauthentic in one direction. One day it just came to me - I can edit differently!
So, here is how I edit my personal photos for my Instagram and blog.
The Apps
The 4 apps I use to edit and post are:
VSCO for color correction
SnapSeed to remove unwanted objects
PicLab to add texture
UNUM to create a curated feed

Step 1: VSCO to edit colors and straighten
I have a Recipe set up in my VSCO so that all of my photos are edited the same - the only thing I play around with in a specific photo is exposure. (If you aren't sure how to create a recipe, check out this help article).
I'll break down my recipe so you can see what edits are made to my photos:

Open the photo in VSCO.
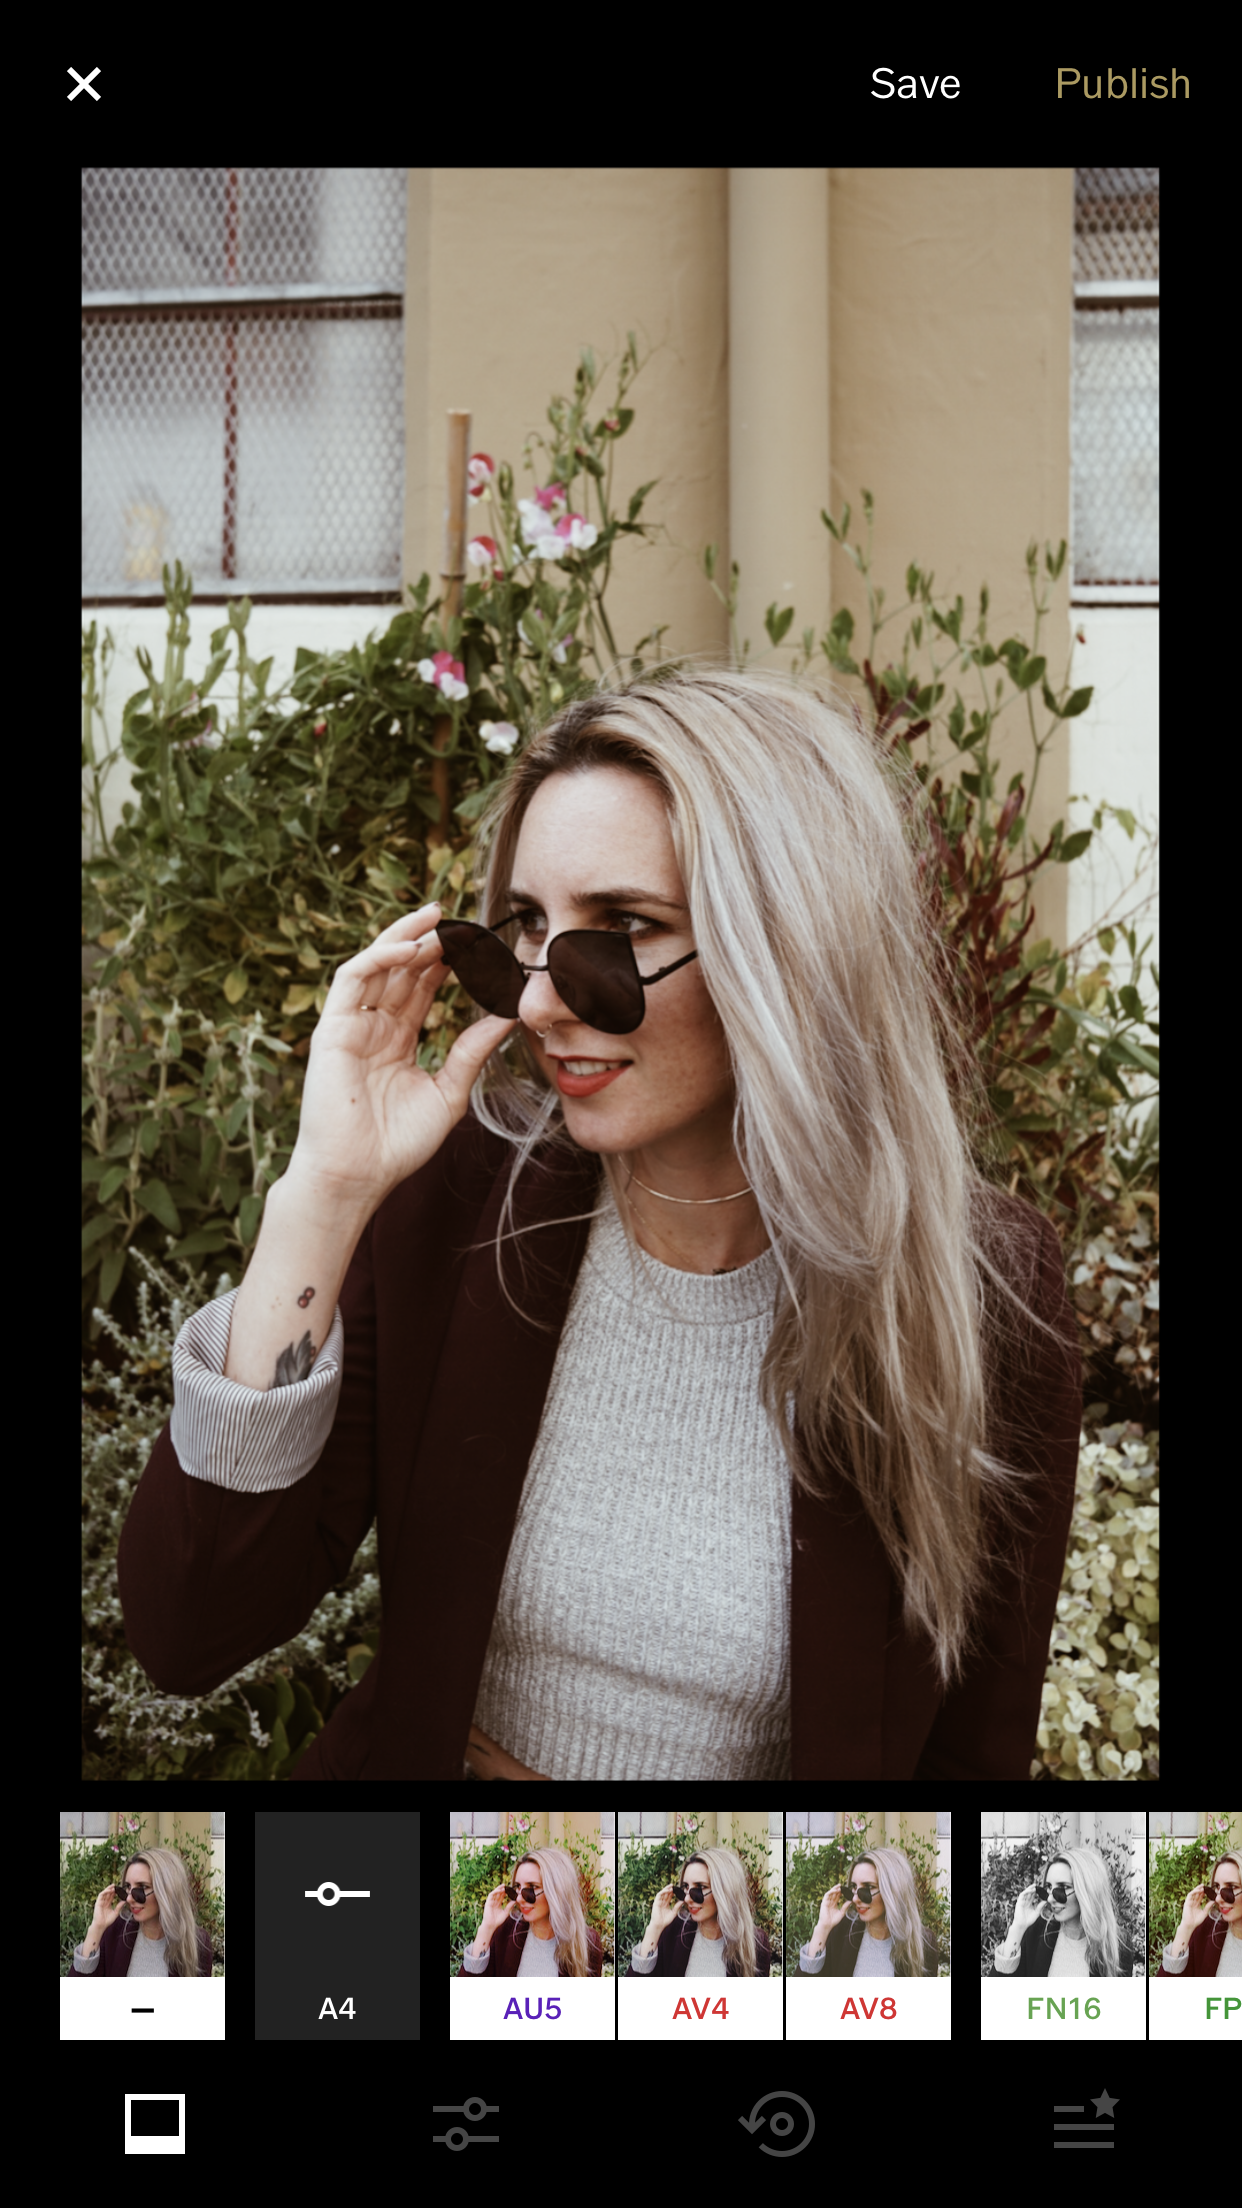
Filter using A4.

I usually lower the exposure on my photos because I like them to look dark.

I sharpen the image a lot.

Add a bunch of grain.

Save at actual size to ensure photo quality.

Other tools I use in Instagram if needed for the photo (not needed for this one) are Straighten, Crop, and X-Skew and Y-Skew.
Straighten allows you to move the photo in a circle to the left and right, to straighten it if it's photographed off-kilter. I usually choose a straight horizontal or vertical line in the background to go off of to ensure that the photo looks straight to the eye.
Crop is an obvious one - I generally don't crop my photos because I love the context of a situation, but if there's something that I really don't like it the photos, I will crop it out.
X-Skew and Y-Skew are super powerful! These make one side of your photo larger or smaller, either on the Y or X axis (depending on which tool you're using). This is great for skewed perspectives - for example, if you are shooting slightly up against a building with straight lines, the lines will naturally come in towards the center from that perspective. You can fix that using the Y-Skew, so that all of your lines are straight, which creates a much more remarkable photo.
Step 2: SnapSeed to remove unwanted objects
There wasn't actually anything in this photo that I felt I needed to remove, but there is usually a questionable smear on the wall, or an obnoxious red alarm sign, or some other ugly obstruction that shows up in the photo and ruins the esthetic. There's an easy way to remove those using SnapSeed! (Some people prefer Lightroom for mobile, or a variety of other apps that do this, but I personally use SnapSeed).

Load the photo into SnapSeed and click on Tools, then choose Healing.

Use two fingers to zoom and one finger to activate the healing tool, and drag it over the questionable object to remove it.
Pro Tip: The more zoomed in your are on the object you're removing, the cleaner the end result will be. So always zoom in enough so that the object fills up most of your screen.

Let's say we wanted to remove the bamboo sticking out of the flowers in this photo.
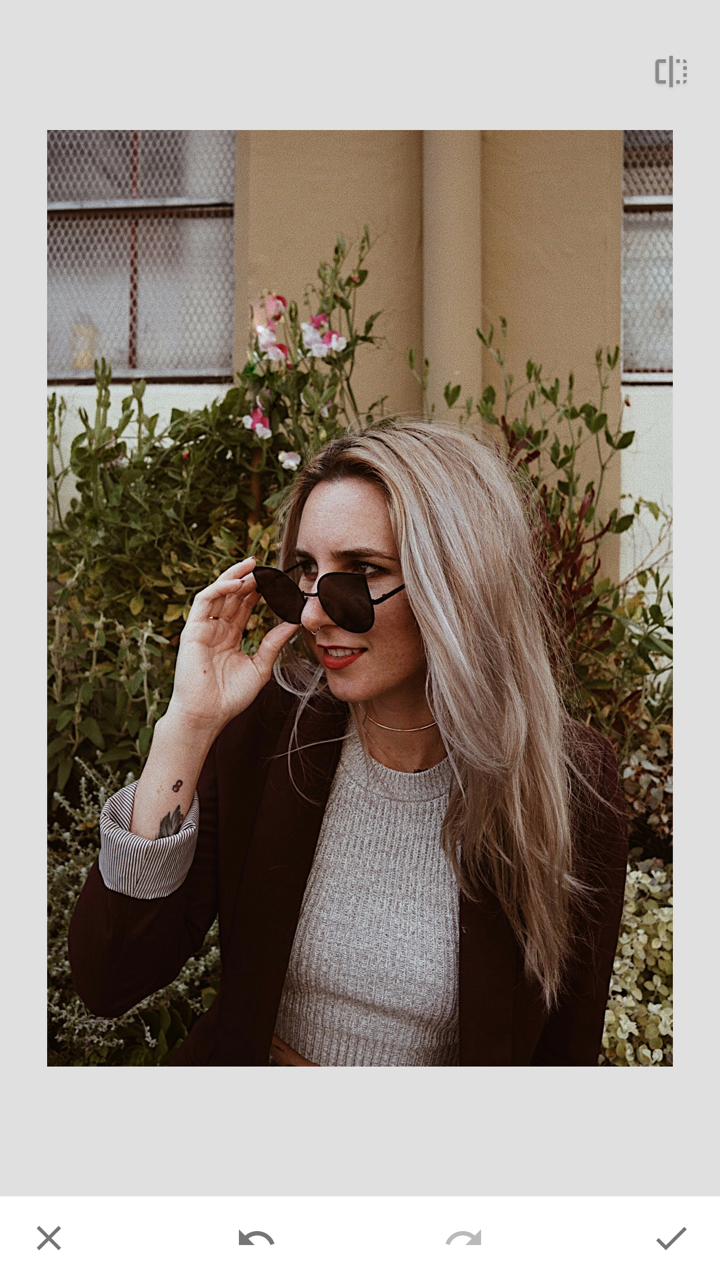
Ta-dah! Annoying stick is gone.
Step 3: PicLab to add texture
I use PicLab to add a scratches overlay for texture. There are a lot of apps available that add scratches, but all of them look a bit different, and PicLab gives my favorite look.

Open the edited photo in PicLab.

Go to Overlays and then Scratches.

I use SC07 - that's my favorite scratches filter.
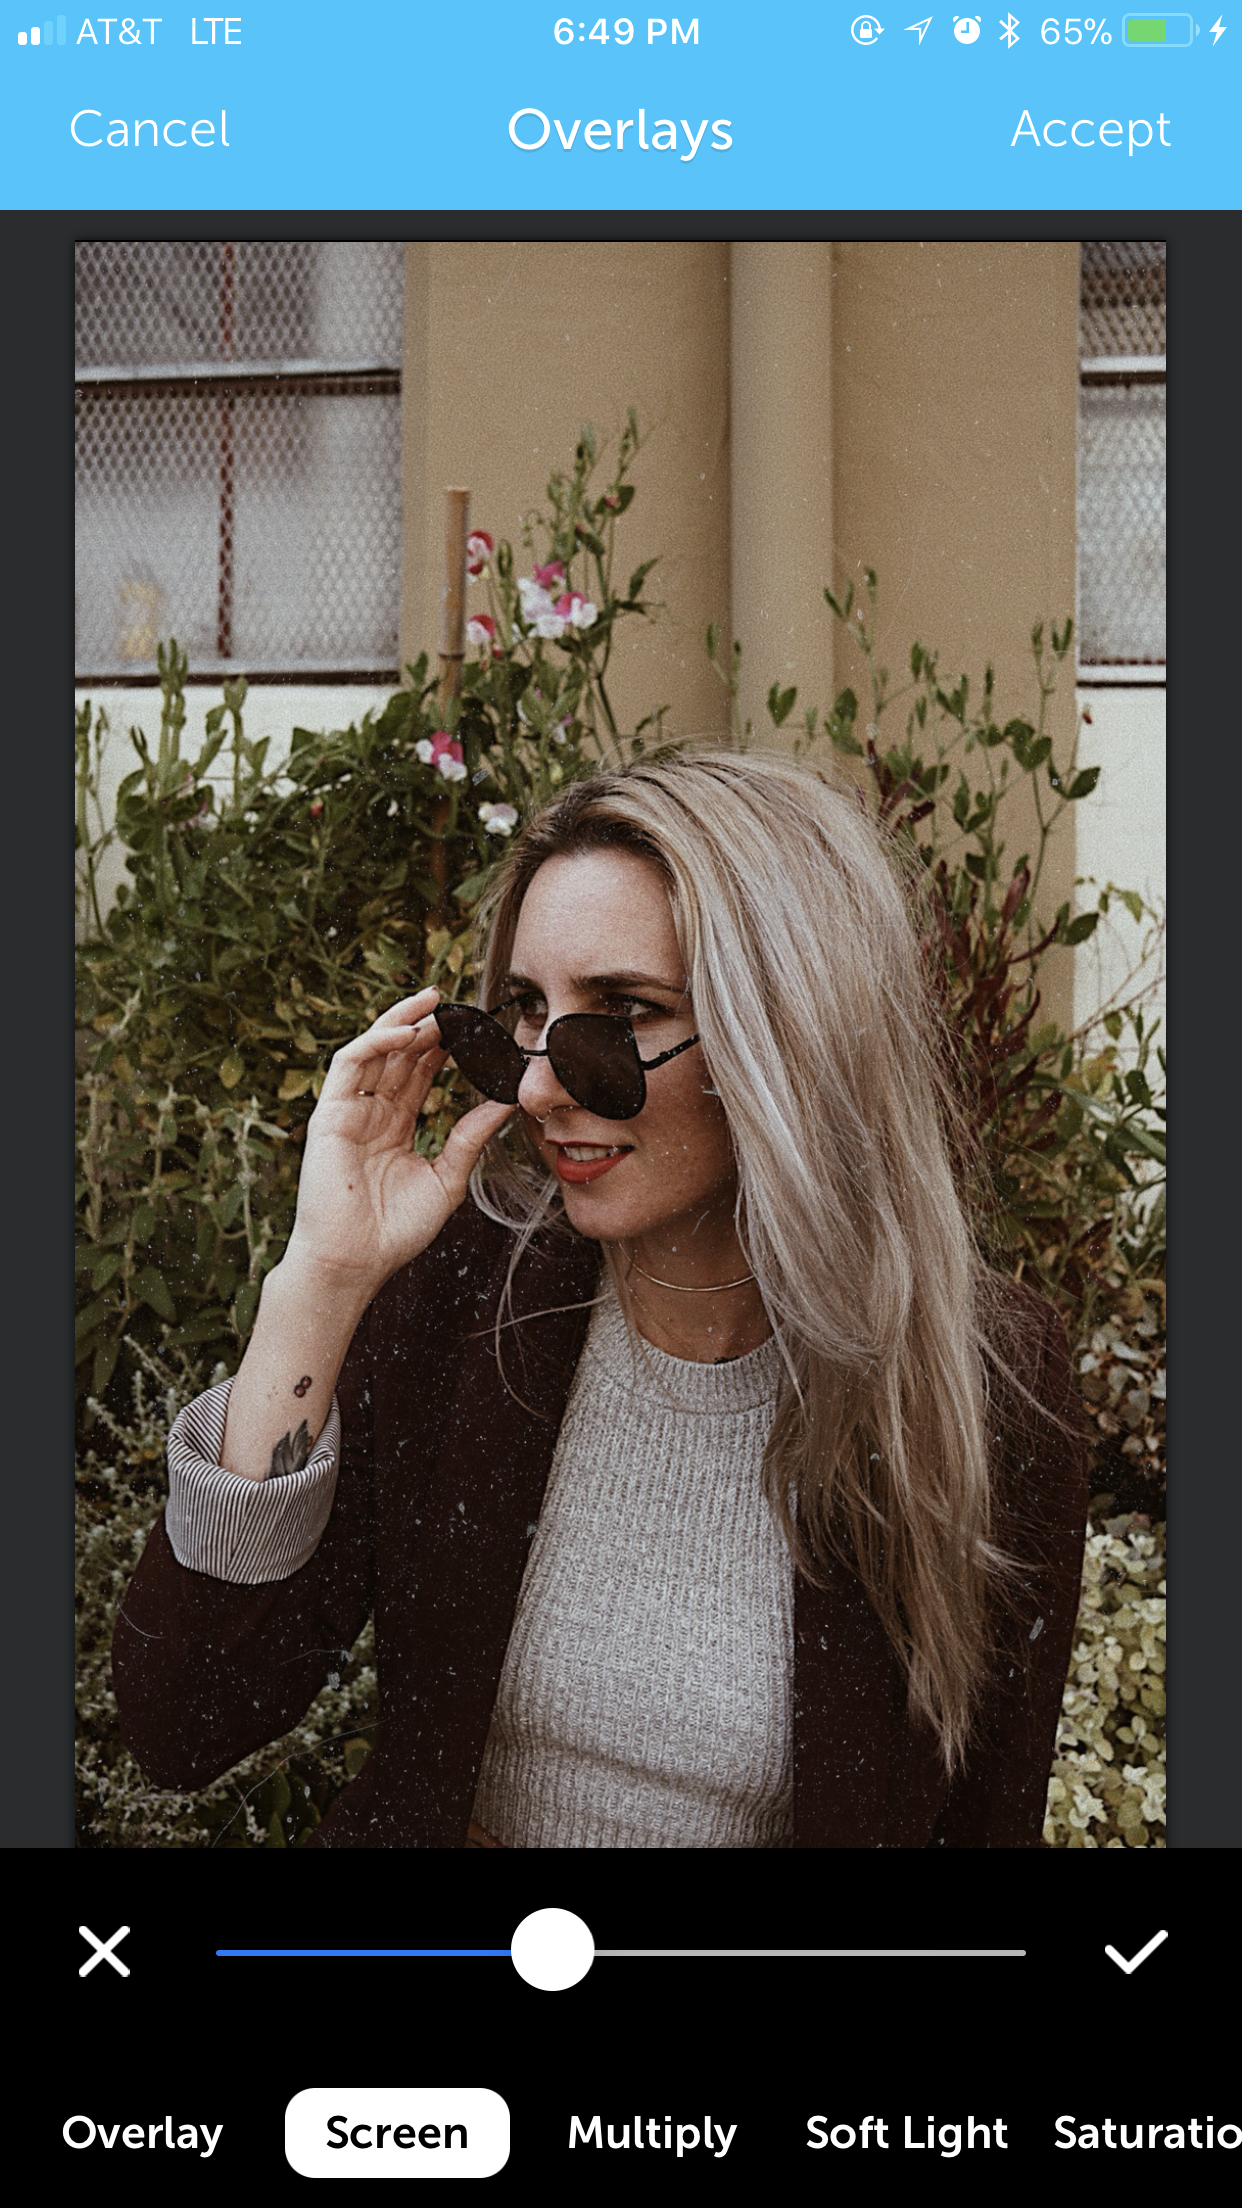
I use the filter on Screen mode and usually lower the opacity to around 40-50%, depending on the photo.
That's it for editing! This is the final product. I love the deep, dark, brown-toned colors, and the added texture of the scratches.

Step 3: UNUM to curate your feed
There are a lot of different organization apps for your Instagram feed, but my personal favorite is UNUM. It's free, it's super easy to use (drag+drop), and it even gives you stats. All you have to do is add your photos into the app; it auto-loads your existing Instagram feed, and then you can drag and drop your new photos to move them around and see what order works best.
This is a crucial step to having an esthetically pleasing feed. You can have amazing photos, but if they're in a weird order, you won't have a beautiful feed. This allows you to see what your feed will look like before you post (since you can't move it around after you post).

That's it!
Hope you enjoyed this and learned a few things! My editing style is simple but my esthetic is specific - it's darker than a lot of other feeds, and I happen to love that look.
Let me know if you have any other burning questions! I'd love to answer them :)
